MyPictures is a ASP.NET Web API sample application for exposing Pictures in Blob storage. It also has a simple web interface to consume the services.
The sample was built using ASP.NET MVC 4, ASP.NET Web API, jQuery and Windows Azure Storage for the underlying data store.
- Start the Windows Azure Storage Emulator.
- Open Visual Studio 2012.
- Compile the solution. The NuGet packages dependencies will be automatically downloaded and installed.
- Set the MyPictures.Web as startup project and press F5.
-
To run this sample on the cloud you need a Windows Azure Subscription. If you don't have a Windows Azure account, you can sign up for a free trial here. Once you set up your account, go to the Windows Azure portal at http://manage.windowsazure.com.

-
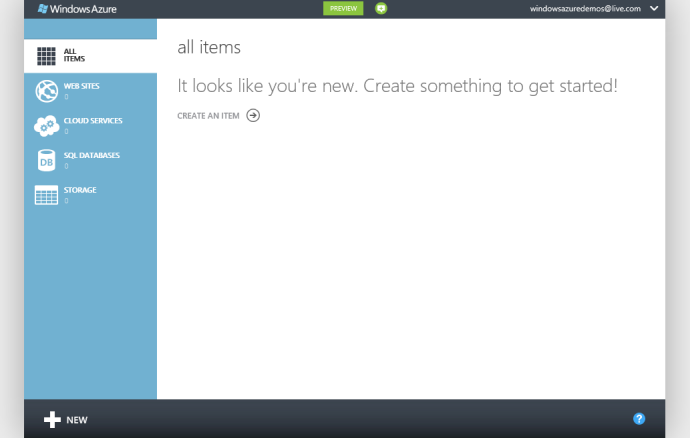
Click on the New button, then select Web Site -> Quick Create. Then enter in a name for the site. Select the region most appropriate given your location. Then, click the check button to create the web site.

-
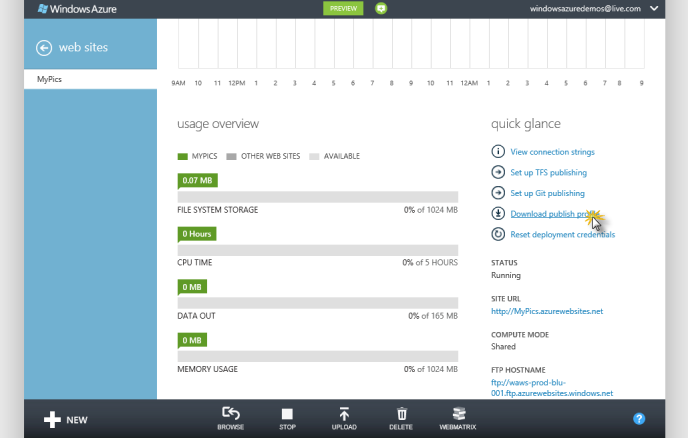
Once the site has been created, click the site's name in the leftmost column to open the site's dashboard. Scroll down until you see the Quick Glance navigation bar. Click the Download publish profile link to download the Web Deploy publish settings file.

-
Click the Save button to save the file to your local computer.

-
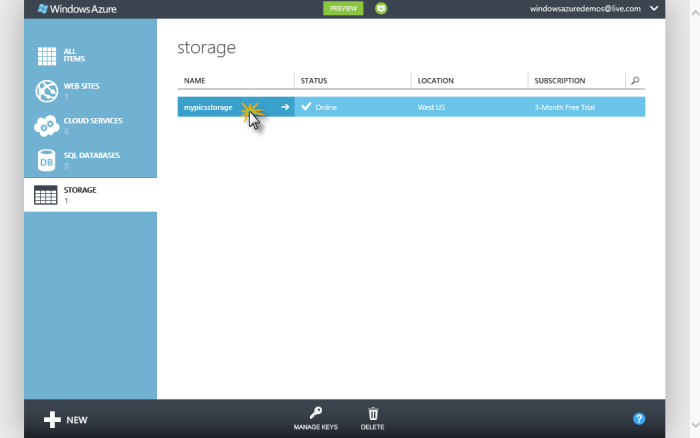
The MyPictures sample uses Windows Azure Storage to store the images and metadata about the images. To provide storage for the images you'll need to create a Windows Azure Storage account. To do this, click on the New button at the bottom of the portal. Then, select the Storage option from the menu. Select Quick Create, and then provide a name for your storage account. Click the checkmark icon to create create the storage account.

-
Once the storage account is created, click the name of the storage account from within the portal to open the storage account's dashboard page.

-
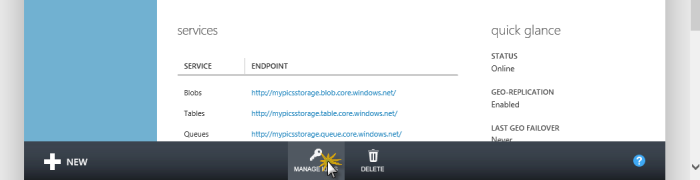
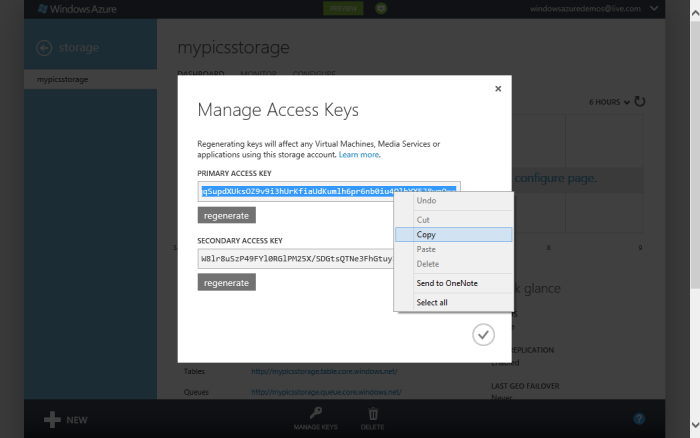
Click the Manage Keys button at the bottom of the portal window in the storage account dashboard.

-
The Manage Access Keys dialog window will open. Select the Primary Access Key textbox. Then, copy the entire contents of this textbox to your clipboard.

-
One of the solutions (MyPictures.WithTests.sln) contains unit tests you can use to test the functionality of the MyPictures application. The second solution (MyPictures.sln) contains only the web site code.
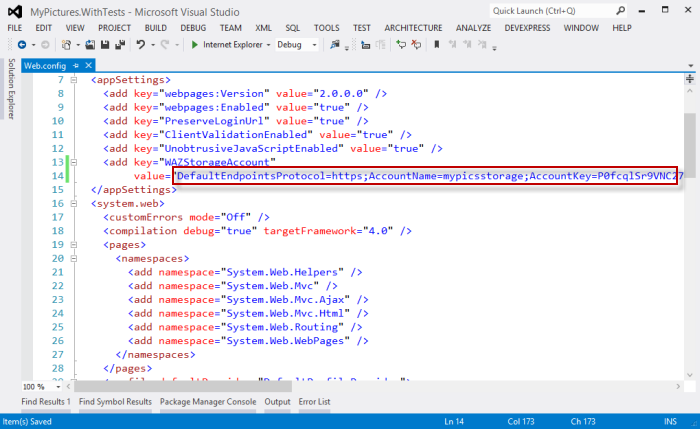
Open either of the Visual Studio solutions. Then, open the web site's Web.config file. Find the WAZStorageAccount appSetting element. Note that the application is configured to use the local Windows Azure Storage Emulator. If you want to run the sample from your local workstation, you'll need to make sure you run the Windows Azure Storage Emulator first.

-
Change the value of the WAZStorageAccount appSetting's value attribute to reflect your new Windows Azure Storage account. The format of Windows Azure Storage connection strings reflect both the Storage account's name and the access key.
(Code Snippet - Windows Azure Connection String Format)
DefaultEndpointsProtocol=https; AccountName=YOUR-ACCOUNT-NAME; AccountKey=YOUR-KEY

-
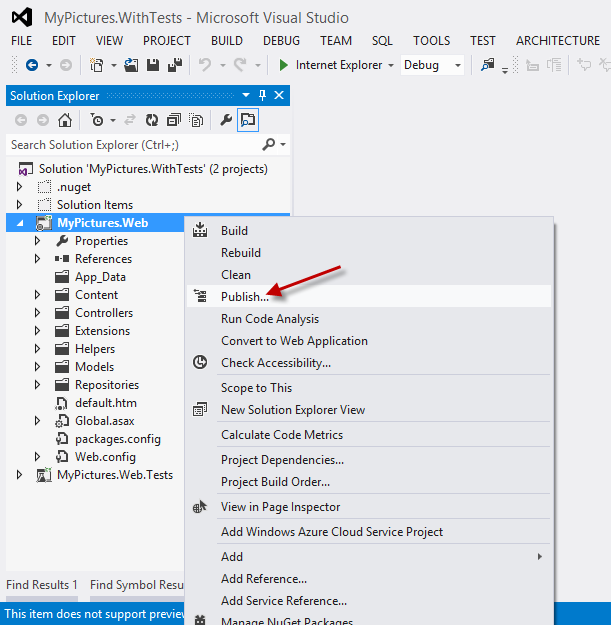
Right-click the web site project and select the Publish menu item from the context menu.

-
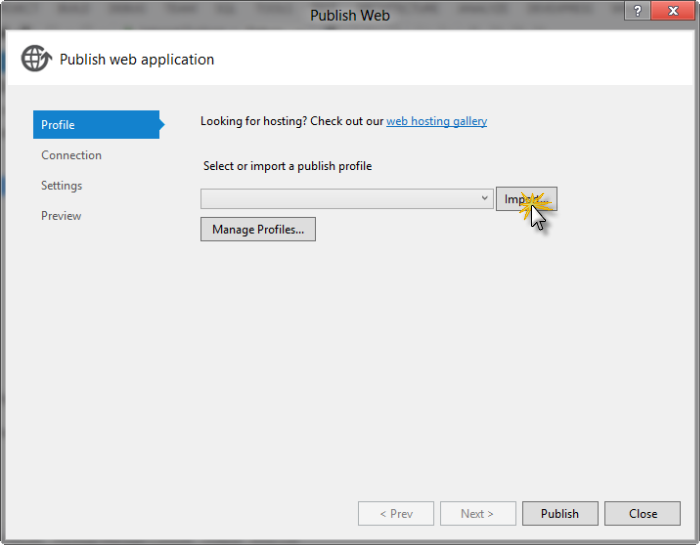
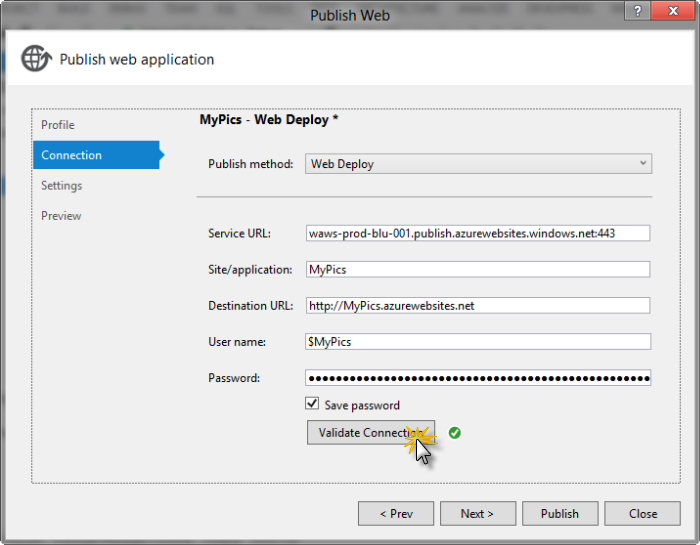
When the Publish Web dialog opens, click the Import button. Then, find the .publishsettings file you just downloaded from the Windows Azure portal's web site dashboard.

-
Click the Validate Connection button to verify the deployment can connect to Windows Azure. Once it confirms with the green checkmark icon, click the Publish button to deploy the MyPictures sample code into your new Windows Azure web site.

-
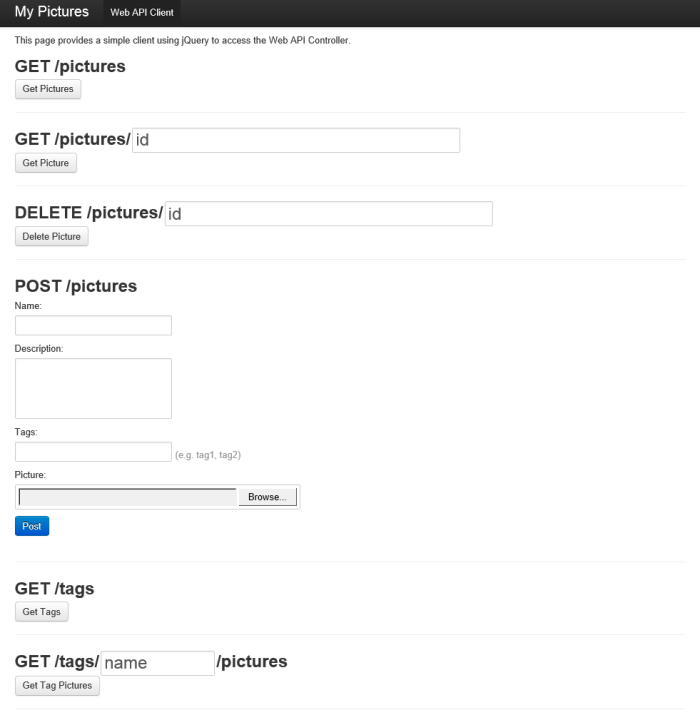
Once the deployment completes, the site will open in your default web browser. The user interface for the MyPictures sample contains a basic form you can use to upload and retrieve your photos, using jQuery code that makes calls to and from the server using ASP.NET Web API.

-
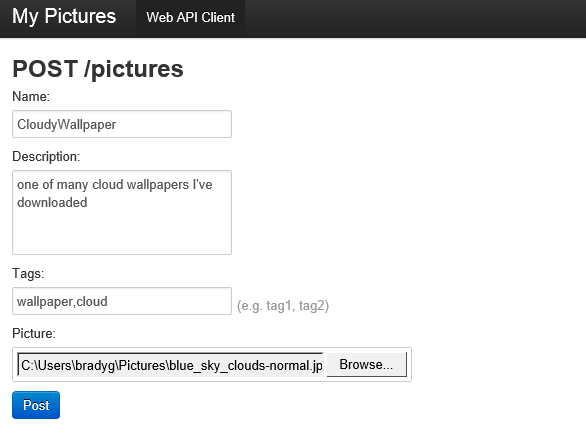
To try the sample out, scroll down until you see the POST /pictures area of the form. Click the Browse button to find a picture from your local workstation. Then, enter in some metadata about the picture and click the Post button to upload the picture using Web API.

-
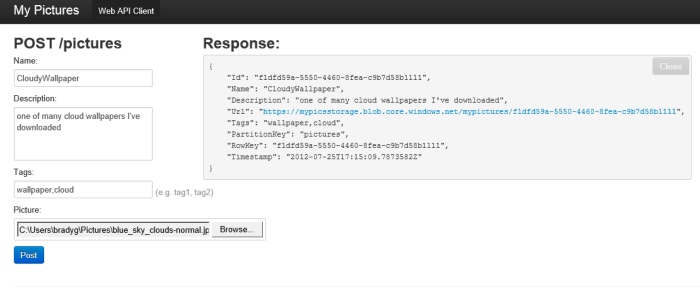
Once the image is uploaded, Web API will return a JSON-formatted response containing metadata and a URL linking to your picture, which has been stored in Windows Azure Blob Storage. The metadata itself is stored into Windows Azure Table Storage.

-
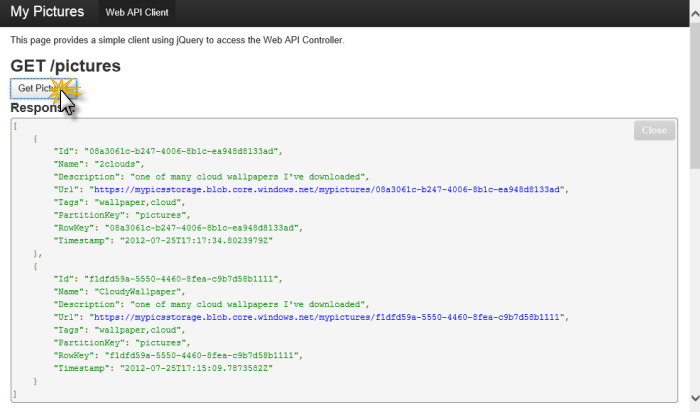
To get a list of all the pictures you've uploaded, scroll up to the top of the form and click the Get Pictures button. The JSON body of the response obtained from Web API will be displayed in the browser.

-
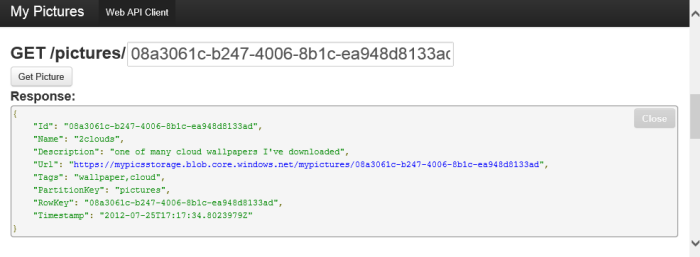
To get an individual picture from your uploaded library, copy the Id of the picture and paste it into the textbox on the GET /pictures form and click the Get Picture button. The JSON output will contain the metadata and direct URL for the individual picture you requested.

-
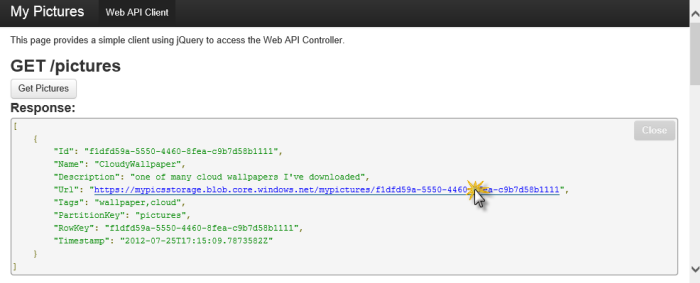
The URL property of any of the images returned from Web API will be an active link. Upon clicking the link, the picture will be opened in the browser window.

-
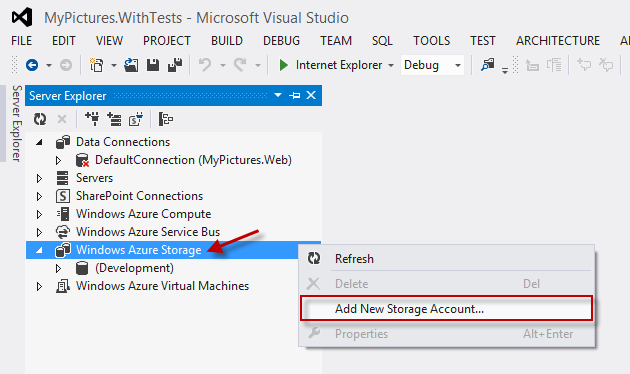
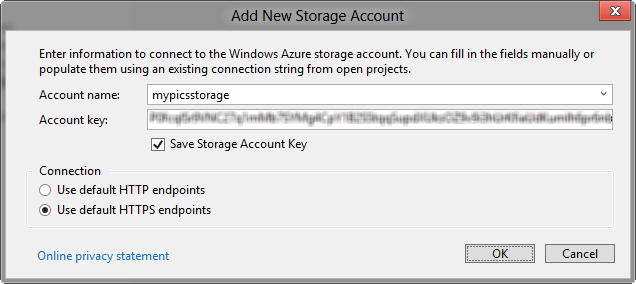
Go back to Visual Studio 2012. Click on View -> Server Explorer menu item to open the Server Explorer window in the IDE. Right-click the Windows Azure Storage node and select Add New Storage Account from the context menu.

-
Enter in the name of your storage account, and paste in the account key. Enable the Save Storage Account Key checkbox and click the OK button.

-
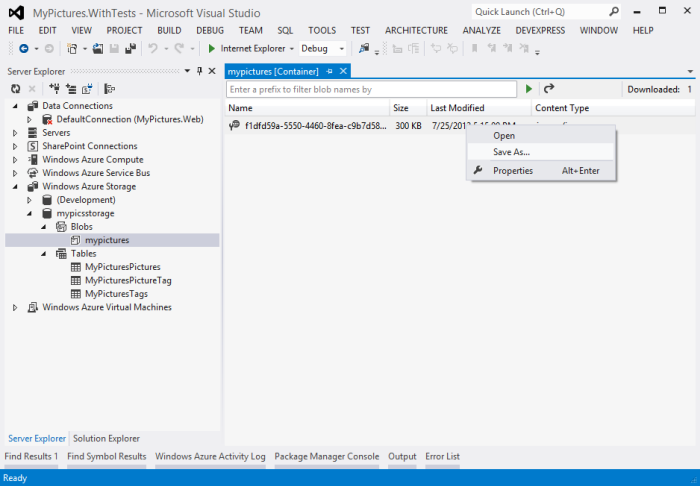
The images are stored in Windows Azure Blob Storage, and the metadata for the images is stored in Windows Azure Table Storage. To see the images that have been saved as blobs, select the Blobs node and then double-click the mypictures container node name. The list of blobs stored in the account will open. To download one, right-click the individual blob and select the Save As menu option. Then, select the destination folder on your workstation in which the picture will be saved to download the file.
To look at the metadata, expand the Tables node from the Storage Account, then double-click any of the tables to view the information stored for each picture.