
"AAAAAH!" - this alarm if you won't get up
alarm-thingy is an ESP32-based Smart Alarm that tracks your sleep, and gets angry if you don't get up. Through on a pressure sensor, it can recognize if the user gets out of bed or is taking a snooze, and the alarm will stop if the user stops being lazy and starts their day. Here are some of the features of this project:
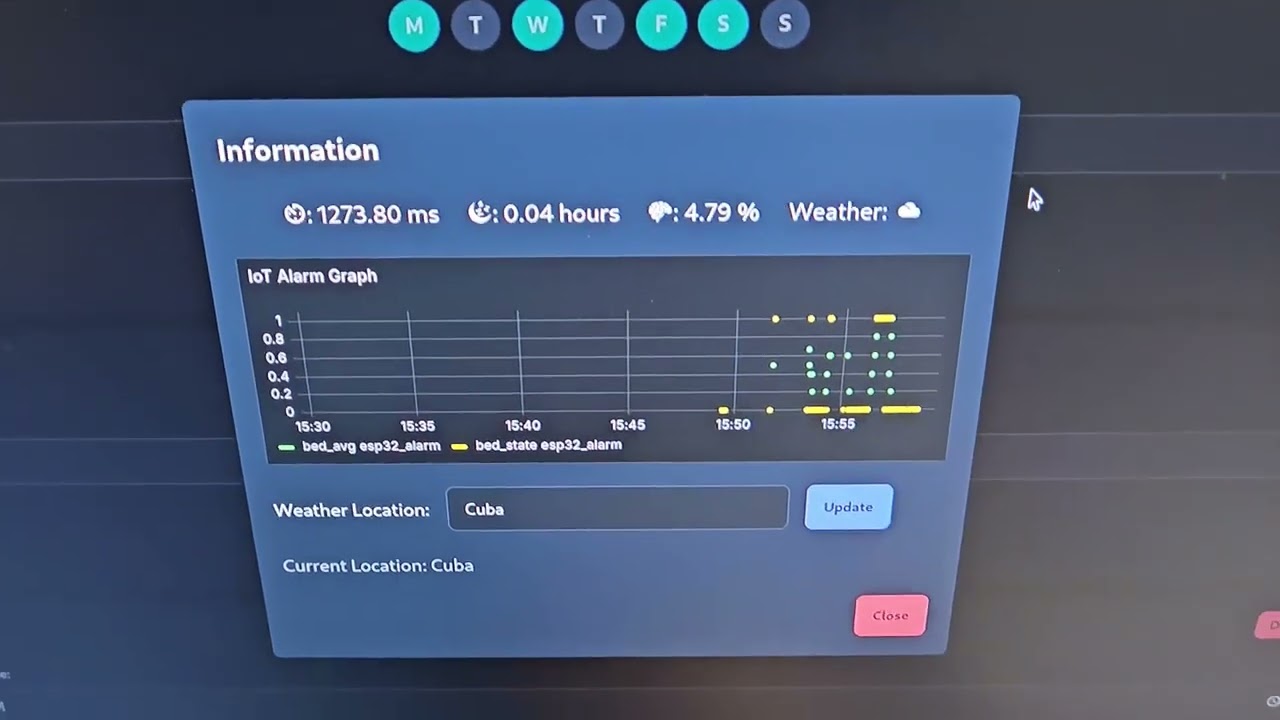
- Beautiful Web App to interact easily with the alarm! Not feeling using the Web App? Check out the Telegram Bot.
- Based on your location and its weather condition, the alarm will play a different, soothing sound.
- Add as many alarms as you want, and decide their weekly pattern. Changed your mind? You can update the alarm on the fly, as soon as you change the values.
- AI-based user detection: through Prophet, you can check the likely-hood of the user being in bed at the current time.
- Easy feedback for the status of the ESP32: depending on its network status, the alarm will play a sound and blink the LED whenever it's successfully sending data to the server.
- Laziness-mitigation technology: if you won't be up by 30 seconds since the start of the alarm, a high-volume metal soundtrack will play.
- No need to setup IPs: the Broker and server will find the alarm by themselves through mDNS.
- Having connection problems? The alarm will reconnect to the server as soon as the connection is available again.
- Lots of statistics in the Web App: View the total sleep time in the last 24h, view the current weather in your location, and more!
- View the current state of the sensor in real-time in the Web App through a Grafana dashboard.
- Switch to HTTP or MQTT on the fly for sending sensor data.
- And much, much more...
More information can be found in the docs/report.pdf file.
Click the following link to watch a video demo of the project's features:
To setup InfluxDB, you'll first need to log in to the frontend using the default credentials (username:admin, password:admin123). Afterwards, you'll need to create and copy a secret token. Said token must be inserted into 3 different filenames.
backend_secrets.py, which must be inserted into thebackendfolder.analysis_secrets,py, which must be inserted into thedata_analysisfolder.
In each file, you'll have to create Python variable named influxdb_api_token.
e.g. influxdb_api_token = "[your_token_here]"
The Grafana environment is already set up using automatically by the files into the grafana folder and the Docker compose.
Warning
You may need to change the permission of Grafana's data folder for it to work properly.
To do that, simply run the command:
chown -R $USER grafana/data && chmod -R 777 grafana/data
You'll have to setup 2 additional secrets files:
esp_secrets.py, in theesp32folder. This file must contain 2 variables namedWIFI_SSIDandWIFI_PASSWORDrespectively.- e.g.
WIFI_SSID = "my_wifi_ssid"andWIFI_PASSWORD = "my_wifi_password"
- e.g.
telegram_secrets.py, in thetelegram_botfolder. This file should contain the Telegram Bot token inside of a variable calledTELEGRAM_BOT_TOKEN.- e.g.
TELEGRAM_BOT_TOKEN = "[your_token_here]"
- e.g.
To enable the AI features, you'll need to run the train_fake_model.py script from the data_analysis folder.
python train_fake_model.py
This will output the model weights trained on a synthetic dataset in which the user's habits consists on sleeping from 9PM to 5AM.
You can also train a model on real data using the train_data_from_influxdb.py script to extract the data from InfluxDB and then use the train_model.py script to train the model on the InfluxDB data.
Here are the schematics on how to setup the speaker and DFPlayer Mini module with to interface with the ESP32.

To make the ESP32 actually play some sounds, you'll need a MicroSD card. Insert it to your PC and add to it 7 different mp3 files which correspond to each chime that you want your ESP32 to play.
- Use the
docker-composefile provided in the repository, and start the infrastructure with the following command:
docker-compose up --build
- In addition, you'll need to upload the ESP32 firmware to the ESP32 itself using something like Pymakr. There is also a handy VS Code extension.
- Finally, start the backend server using the following command in the root of the project folder:
python backend/server.py
Aaaand... you're done! Enjoy your smart alarm experience!
To view the Grafana dashboards, navigate to localhost:3001, and for the Web App, visit localhost:3000.
To run the accuracy script, make sure that the InfluxDB instance is up and running. Then, simply use the script in this way:
python sleep_accuracy.py [hours slept]
E.g. python sleep_accuracy.py 8.0


This DFPlayer Mini MicroPython library was used from here: https://github.com/lavron/micropython-dfplayermini. It was very handy for this project.