Getting started with the GUID activity
The GUID activity returns either a GUID or a Cryptographically Secure GUID. This can be stored in a build variable used wherever it is needed in your workflow. In this example we aim to show the basic steps that are required to get the activity integrated into a build.
Before you can make use of any of the TFS 2010 community build activities you have to make sure they are available for the build system and on your development PC. Instructions for this process can be found in the ALM Rangers build guide or in the getting started page of this wiki. This page assumes the GUID activity is available in the developers build process workflow toolbox.
First we need to create the variables to store the generated GUID. In most cases you will create a single string variable as you will want the GUI as either unformatted or formatted. In this case we want to see both so two variables

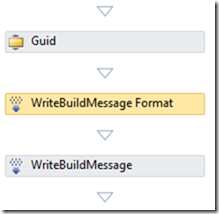
The GUID activity can be created anywhere in the build workflow.
In this sample we generate a GUID and then write it to the build log
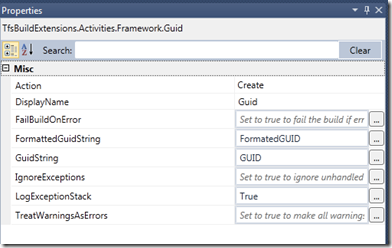
The only properties needed for the GUID activity are the output variables. You can choose if your Create a standard or secure GUID using the Action property, but this defaults to a standard GUID
Next we written the GUID variable via a WriteBuildMessage activity
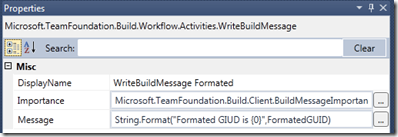
You should see something similar to the following the Build View Log, remember it will only be shown in the log, not the summary
Guid Formated GUID is 5f473984-1a1a-43e5-98a0-cfd6e9a7fd54 Unformated GUID is 5f4739841a1a43e598a0cfd6e9a7fd54